VTuber Rigging & Live2D Workflow: A Complete Guide for Creators
The magic of a VTuber isn’t just in the art—it’s in the movement. When a streamer tilts their head, winks, or laughs, a complex set of digital instructions is working behind the scenes to translate human emotion into a 2D drawing. This process is known as VTuber rigging.
What Is VTuber Rigging? (The Big Picture)
At its core, rigging is the bridge between a static illustration and a living digital persona. In the standard VTuber creation pipeline, rigging sits right in the middle: after the character is designed and “cut” into layers in a program like Photoshop, but before the model is loaded into tracking software like VTube Studio.
The relationship between VTubers, Live2D, and real-time motion is symbiotic. Live2D Cubism—the industry-standard software—uses a technique called “deformable graphics” to warp 2D images in a way that mimics 3D depth.
It is crucial to view VTuber rigging as a workflow rather than a one-off technical step. A rigger must consider how the art will respond to the performer’s webcam tracking in real-time, ensuring that the movement feels natural rather than robotic. According to Live2D’s official documentation, this technology is now used in thousands of games and apps worldwide, making it a highly sought-after skill in the creator economy.
How Live2D Rigging Works: Core Concepts Explained
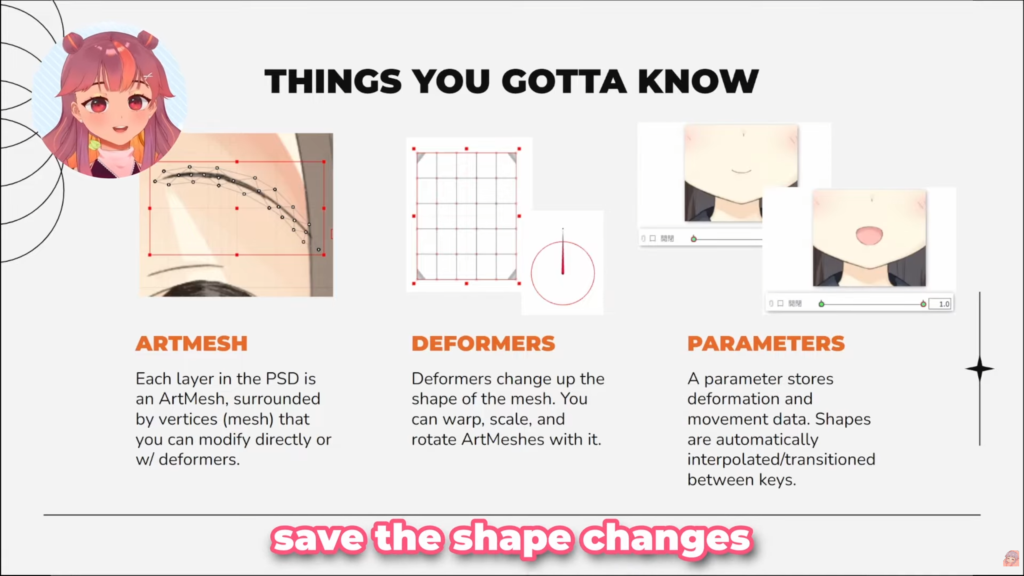
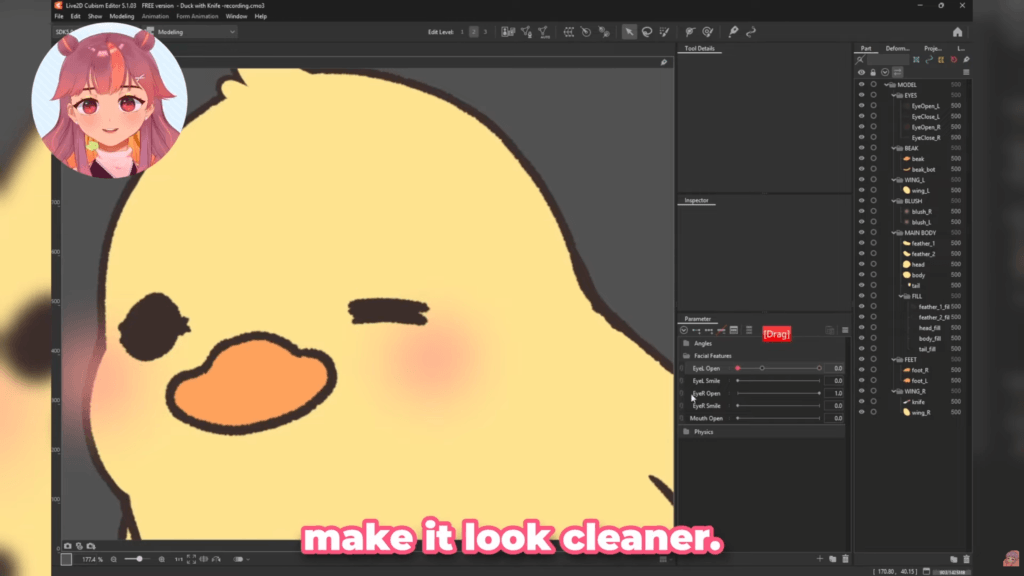
Before opening the software, you must understand the “holy trinity” of Live2D: Art Meshes, Deformers, and Parameters.
The Roles of Art Meshes, Deformers, and Parameters
- Art Mesh: The actual image layer. It is covered in a web of “vertices” that can be pulled and pushed.
- Deformers: Containers that sit “above” the Art Mesh. They allow you to move entire groups of meshes at once, such as moving a whole eye or an entire arm.
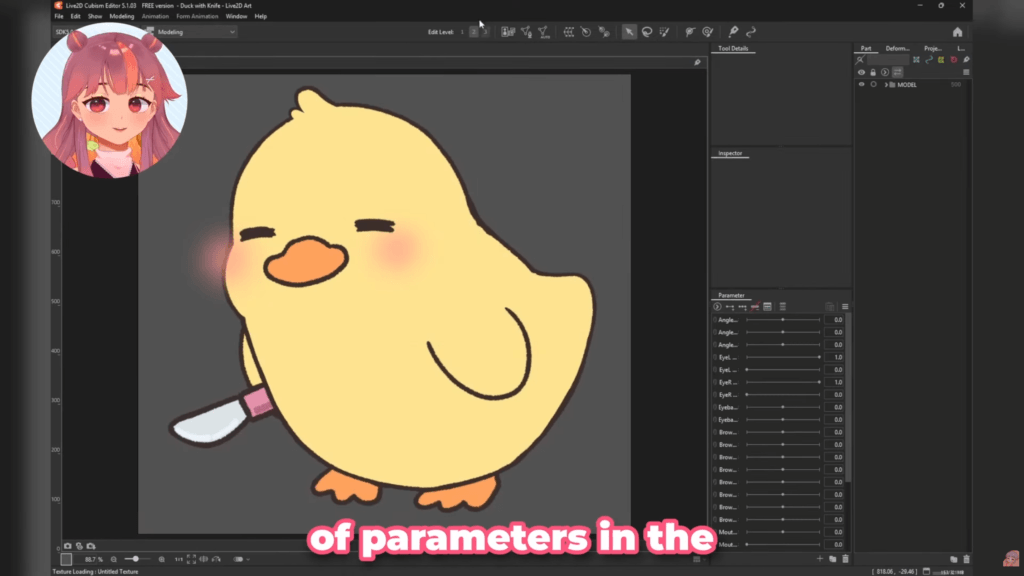
- Parameters: These are the sliders that control the motion. For example, a “Body Lean” parameter stores the model’s position at -1 (left), 0 (center), and 1 (right).
Simulating Depth and Motion
Live2D simulates depth by using “XYZ” axes. While the art is flat, riggers use Deformers to squash and stretch elements, creating the illusion of a head turning (Angle X) or tilting up and down (Angle Y). This perspective shift is what makes a model feel high-quality.
Advanced Expression Control with VBridger
For creators looking to push facial expression further, advanced tools like VBridger can be integrated alongside VTube Studio. VBridger unlocks additional facial tracking parameters, allowing for more granular and expressive control—especially for high-end Live2D models.
Common Misconceptions
Beginners often think rigging is “animation.” It isn’t. Animation is a fixed loop; rigging is building a reactive puppet. Another misconception is that the software does the work for you. In reality, a smooth model is the result of thousands of manual micro-adjustments.
Beginner Live2D Rigging: Getting Started
Starting your first project can be overwhelming. The best approach is to start small and focus on “micro-expressions.”
What Beginners Rig First
Most creators start with the “Face Basics”:
- Eyes: Opening, closing, and pupil scaling.
- Mouth: The “Open/Closed” and “Form” (Smile/Sad) shapes.
- Basic Physics: Simple hair swaying or “breathing” motion.
Time Expectations and Learning Curve
Don’t expect to finish a pro-tier model in a weekend. For a beginner, a simple half-body model can take 20 to 40 hours to rig. The learning curve is steep because it requires both technical logic and an artistic eye for anatomy.
Where Beginners Usually Struggle
Many beginners encounter challenges such as hierarchy mistakes, physics behaving unexpectedly, or parameters not responding as intended. These issues are common and part of the learning process, but they can be frustrating without a clear understanding of how different elements interact.
Optimizing Your Live2D Rigging Workflow
To reach a professional level, you need an efficient workflow. Insights from experts like Kira Omori highlight that “working smart” is just as important as “working hard.”
Understand the Building Blocks Before Adding Complexity
Before layering physics or expressions, you need to fully understand:
- Art Mesh: Each imported PSD layer becomes a mesh composed of vertices.
- Deformers: Used to manipulate shape, scale, rotation, opacity, and color without directly editing mesh vertices.
- Parameters: Used to store shape states and interpolate motion between key points.
Set Up Your Workspace and Meshes with Intention
Workflow considerations:
- Arrange panels ergonomically (especially for pen tablet users).
- Use automatic mesh generation for simple areas.
- Manually refine mesh for complex curves like hair tips.
Clean mesh density matters because:
- Too many vertices = instability
- Too few vertices = visual distortion
Use Clipping IDs for elements like blush and shading to maintain visual containment.
Limit Parameters Early to Keep Rigging Manageable
Beginner principle: Avoid assigning too many parameters to one mesh or deformer.
Eye example:
- Separate parameter for Eye Open
- Separate parameter for Eye Smile
Understand left/right inversion carefully. Use the Reflect function for correction—not as a shortcut.
Over-complication is the fastest way to break your rig.
Plan Deformer Hierarchy Before Applying Physics
Hierarchy is everything. Parent deformers must fully encompass child elements to prevent visual breakage.
- Physics Setup: Ensure your frame rate is set correctly (usually 60fps).
- Input Weights: Balance the “weight” of your Angle X, Y, and Z inputs so that hair doesn’t fly off the head when the character looks up. Physics should always follow structural planning—never rig physics before the core movement is locked in.
Structure Motion Before Refining Movement Quality
When rigging a head turn, bind Angle X (horizontal) first, then Angle Y (vertical). Only once these are perfect should you use “Synthesize Corner” to generate the diagonal motions. Save the “flair”—like full-body squash and secondary bounce—for the very end of the workflow.
Consider Time, Tools, and Professional Practice
Professional VTuber rigging production can take anywhere from 2 weeks to 2 months depending on complexity. Many pros use macro controllers (like a Stream Deck) to quickly toggle parameters, reducing physical strain on their wrists.
If you plan to do this professionally, focus on portfolio building and clear communication. According to market trends on Gumroad, high-quality Live2D assets and rigging services are currently among the most profitable niches for digital artists.
Choosing the Right Path: What Should You Learn Next?
Now that you understand the workflow, where do you go from here? Your next step depends on your specific goal:
- If you’re looking for VTubing software: Explore the Best Free VTuber Makers to Create an Avatar Model to find the right platform for your debut.
- If you’re new to Live2D: Test your skills with the Live2D Rigging: A 7-Day Challenge to see if you’re ready for the professional grind.
- If you’re new to VTubing: Focus on learning the basics of “cutting” your art specifically for Live2D before you even open the rigging software.
- If you want some of the latest news: Check out our recent post about the VTuber Expo, market trends, new VTuber Funko Pops, and more.
Rigging is a marathon, not a sprint. Take it one parameter at a time, and soon your character will be ready for the spotlight.