Learn How to Rig Your 2D VTuber Model with Live2D Cubism

A great VTuber model starts with great art, and rigging makes that art feel alive. This guide walks you through practical tips for a Live2D Cubism workflow, including:
- prep your PSD
- build clean meshes
- rig parameters
- add physics
- export the right files
By the end, you’ll have a solid grasp of how to rig your 2D model and what you should keep an eye out for.
Credit: This guide includes tips provided by:
- Cutie Dragon, “Live 2D Cubism Tutorial – Basic Tools & Navigation”
- Live2D documentation
What you’ll need
Start with a layered PSD of your existing 2D model, with separate parts like eyes, brows, mouth, and hair chunks. You’ll also need Live2D Cubism Editor, though menu labels may vary by version. Expect iteration, because rigging is a cycle of testing and tweaks.
Before you start: PSD prep checklist
Clean prep saves hours later, and Live2D has PSD guidelines worth following.
- Use clear layer names and keep related parts grouped.
- Avoid merging facial parts that need independent movement.
- Plan for clipping needs up front, like eye whites behind eyelids.
- After import, verify blend modes, since unsupported modes may revert to Normal
(Source: Live2D – How to create PSDs to import, Import PSDs)
Step 1: Set up your Live2D project
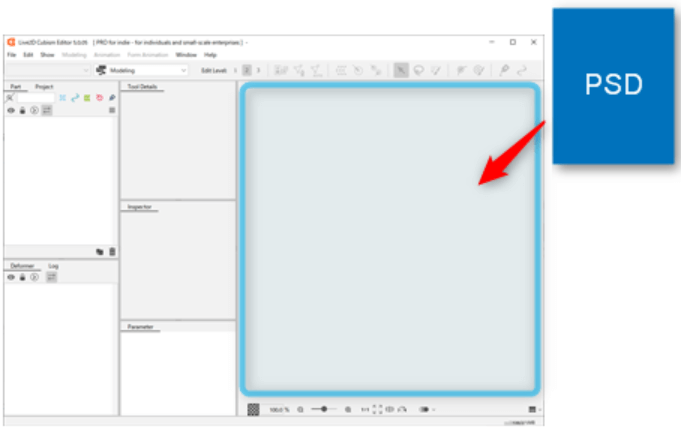
Import your PSD by dragging it into the Model Workspace or use the File menu. Cubism converts PSD layers into ArtMeshes during import, so after confirming your PSD imported, confirm three things immediately:
- Parts List structure (to make sure your PSD groups came in as clean, logical parts, so you’re not hunting for “Layer 57” later)
- Draw order (to confirm face layers stack correctly, so eyelids don’t render behind eye whites or hair pops in front of the face)
- Blend modes (to verify shading and highlights still look right, since unsupported modes may import as Normal and change your final look)
Your Parts List should map cleanly to your PSD structure. Draw order should be correct for facial parts, especially eyes and mouth. Blend modes often import, but unsupported modes can fall back to Normal, so verify key pieces and adjust as needed.
(Source: Live2D – Import PSDs, Blend Mode)
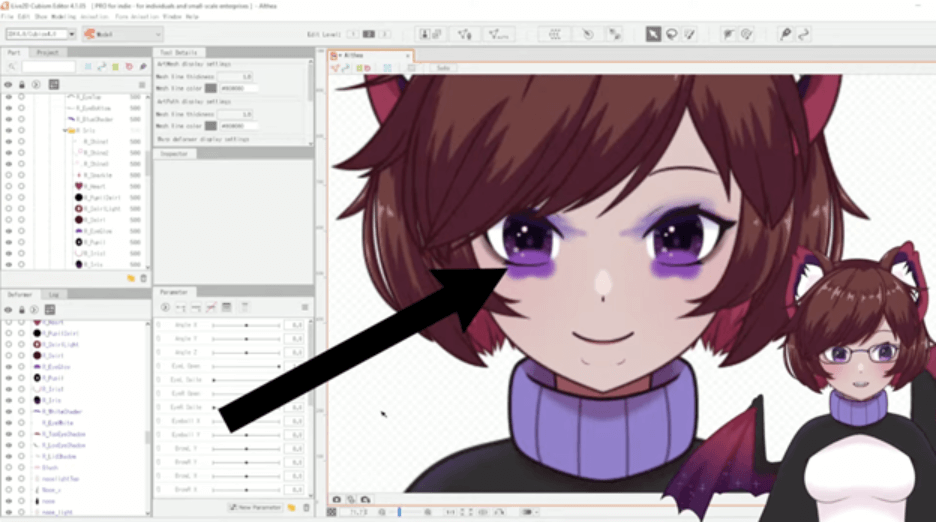
Photoshop-style clipping masks do not carry over automatically, so you’ll need to set them in Cubism. A simple method is to copy the mask ArtMesh ID in the Inspector, then paste it into the clipped ArtMesh’s Clipping ID field. This keeps eyelids, highlights, and inner-mouth shading behaving correctly during motion.
(Source: Live2D – Clipping Mask)
Step 2: Build your ArtMesh
Mesh quality sets the ceiling for motion quality, so spend time here. Automatic mesh is quick and works well for large, simple shapes. Custom mesh gives you better control for detailed deformation. Use automatic mesh for torsos, large clothing panels, and big hair chunks with simple movement. Use custom mesh for eyelids, eyelashes, irises, mouth shapes, and accessories that bend or squash.
For facial parts, add points where the shape needs to compress. Keep edges clean around the mouth opening. Avoid long, skinny triangles in high-motion areas. These choices reduce pinching and make interpolation smoother.
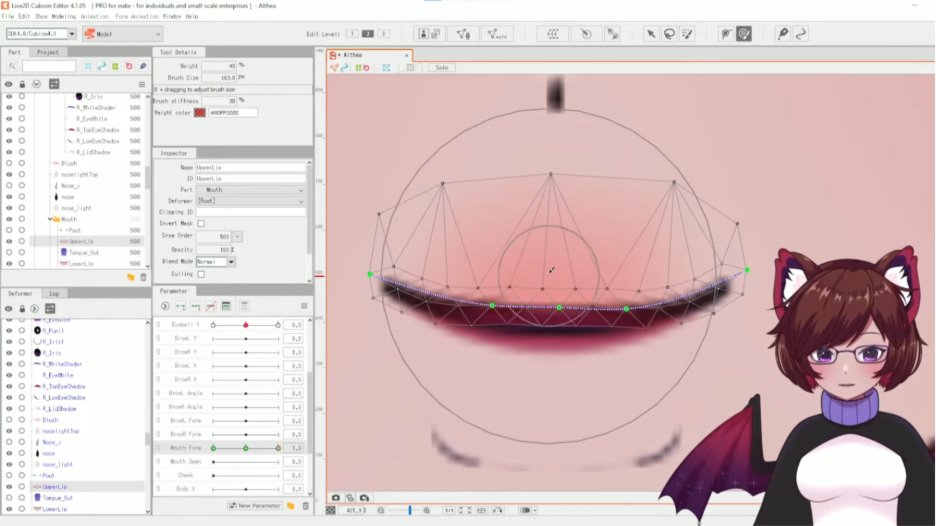
Step 3: Rig deformers and parameters
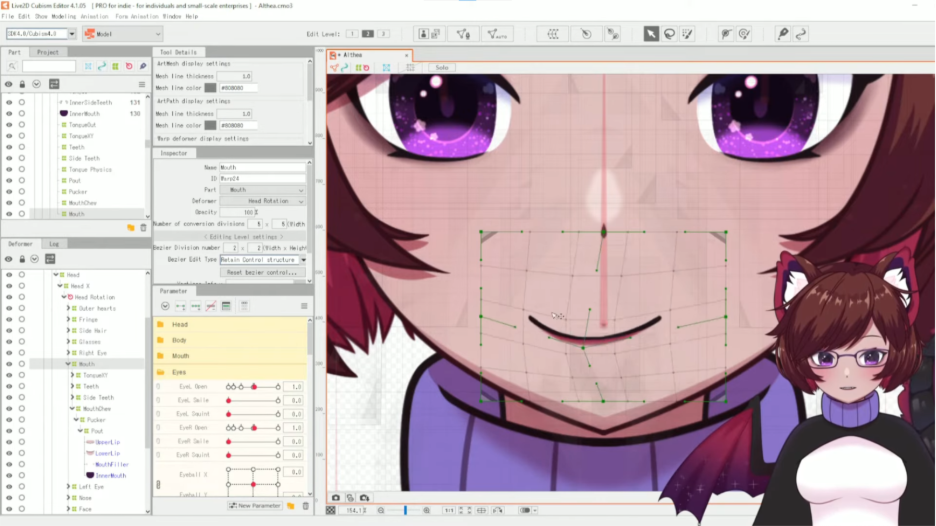
Rigging is an ongoing loop: add deformers, bind them to parameters, then test. Deformers control how ArtMeshes move, and Warp and Rotation Deformers do most of the work. Build a hierarchy early, since children follow their parents in the deformer tree. A strong baseline is one head deformer for the whole face, separate groups for eyes, brows, and mouth, then smaller deformers for fine control like lashes and pupils.
(Source: Live2D – Parent-Child Hierarchy Structure)
Deformer order is not a universal rule, because results depend on the motion you want. If motion looks broken, review your parent-child hierarchy and your deformer combinations. Live2D documents how combinations behave, which helps when troubleshooting (see source to deep dive).
(Source: Live2D – Combination of Parent-Child Hierarchy)
Parameters define movement ranges like blink, mouth open, head turn, and body sway. A practical starter set includes Eye Blink (L/R), Mouth Open, Mouth Form, Head X, Head Y, Body X, and Body Y. Use keyforms to pose at specific values, then rely on interpolation to smooth motion between them.
Some automation tools can save time when used at the right moment. Reflect Motion works best after one side is finished and approved, like a brow or eye. Corner synthesis tools can help fill diagonal positions without sculpting every corner by hand.
Step 4: Test early, then export the right files
Testing is part of the workflow, not the final step. After each major change, move parameters slowly and watch for mesh collapse. Check eyelids at half-blink values. Watch mouth corners for pinching. Confirm clipping stays clean through motion. These checks catch most problems early.
(Source: Live2D – Clipping Mask)
Export is another common failure point, because many guides omit key files. For most runtime use, you’ll need:
- the .moc3 (model data)
- the .model3.json (links model, textures, and settings)
- and the texture .png files from your atlas.
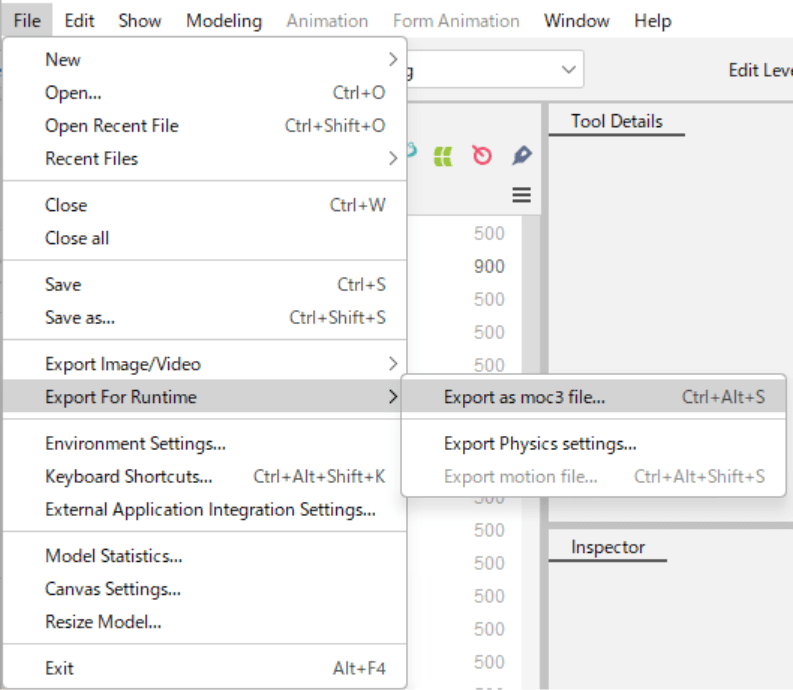
Common extras include .physics3.json if you built physics, plus expression and pose files if you created them.
(Source: Live2D – Data for Embedded Use)
Practice exporting after a key change is made. Keeping a backup, should you need it for safekeeping or to have a fixed iterative spot to launch from, is always a safe move.
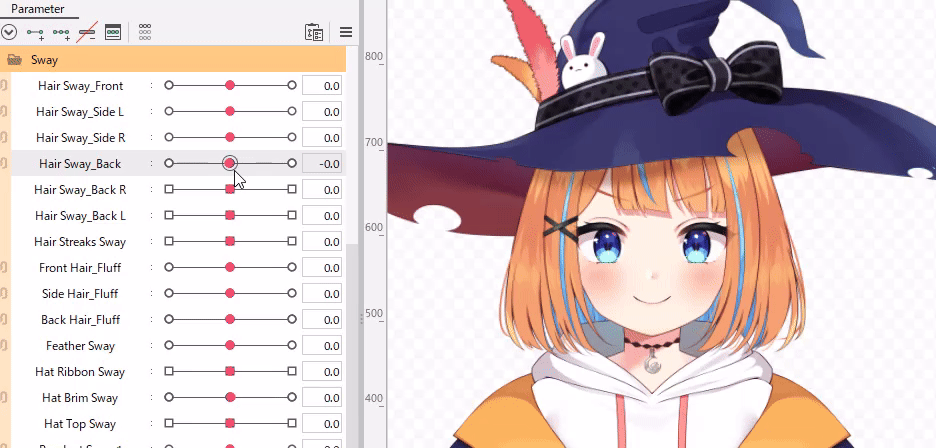
Step 5: Physics, expressions, and final polish
This is where your model gets personality, so start simple and build up. Use physics for secondary motion like hair sway, jacket hems, sleeves, and lightweight accessories. Keep values subtle at first, since strong physics can appear jittery.
Expressions do heavy lifting on-camera, even when they are small. Prioritize a few that you’ll use constantly, like happy, neutral, annoyed, and surprised. Add a blink variation or sleepy eye set if it suits the character. Make sure your talking mouth shapes still look good under motion.
Before you wrap up, do a final pass. Check for mesh tearing at extreme values. Look for clipping gaps on common expressions. Confirm draw order stays stable. Most importantly, verify motion looks clean at mid-values, not only at extremes.
Where to use your model next
Once the export package looks right, you can import your model into your preferred VTubing setup and start streaming or recording. If you’re also building web-based experiences, you can extend your character into interactive scenes and invite your audience to explore them on VIVERSE. Check out how to use VIVERSE as an OBS layer!
Want more creator workflows like this?
Browse more VTuber guides on the VIVERSE blog and keep leveling up your skills.
About the tutorial inspiration
This workflow reflects common Cubism best practices and community education from creators like Cutie Dragon, as well as Live2D’s Cubism documentation.