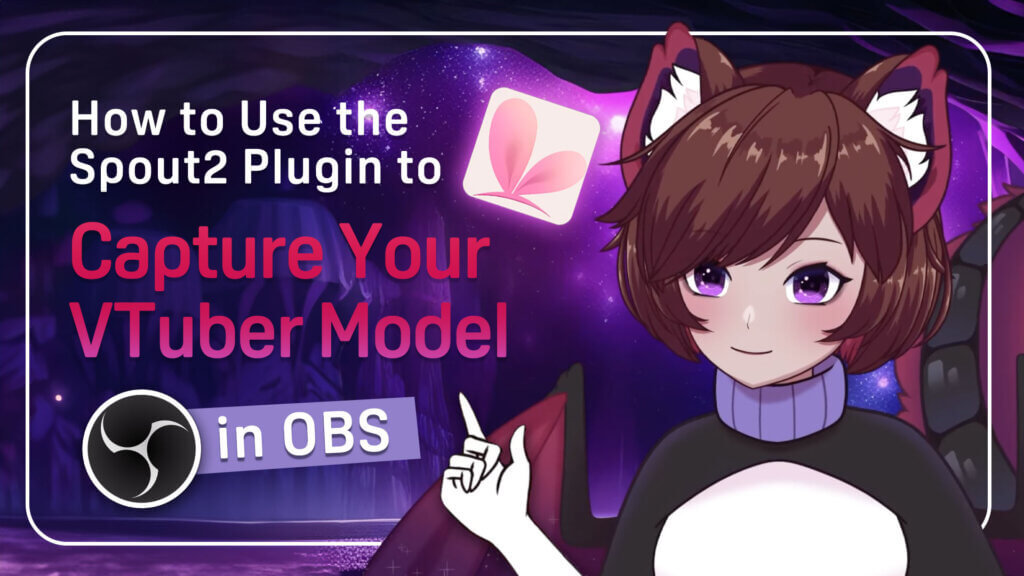
How to Capture VTube Studio in OBS Using the Spout2 Plugin

Ever wanted to stream or record as your virtual self using VTube Studio in OBS without green screens or lag? That’s exactly what this tutorial will help you achieve.
This guide, created in collaboration between VIVERSE and Cutie Dragon, walks you through the best way to capture your VTuber model from VTube Studio to OBS using the Spout2 plugin, an efficient method that eliminates chroma key issues, reduces CPU usage, and delivers smoother performance.
Cutie Dragon, a professional Live2D rigger and VTuber tutorial creator, demonstrates each step in detail to help you set up seamlessly.
Step 1: Enable Spout2 in VTube Studio
🕒 (00:31 – 01:04)
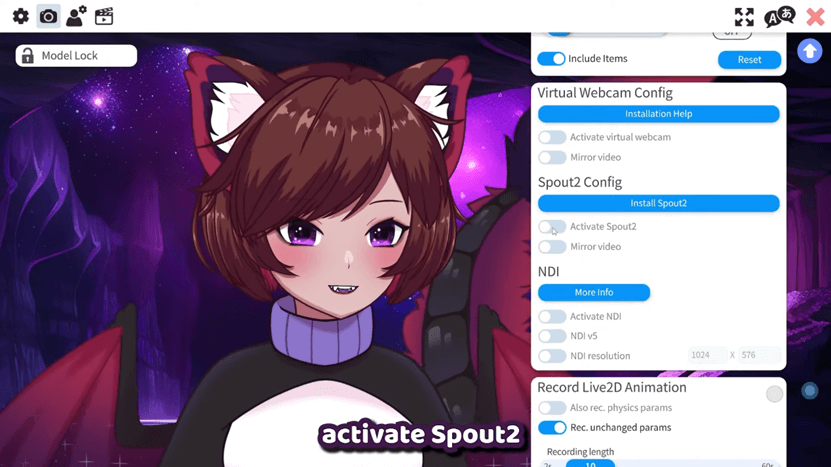
- Open VTube Studio and click the pink Settings gear icon.
- Navigate to the Camera tab.
- Scroll to find Spout2 Config, then click Activate Spout2.
💡 Tip: If you don’t see this option, update your VTube Studio to the latest version. The Spout2 output option is only available in recent updates.
Once activated, VTube Studio can send your model’s video feed directly to OBS.
Step 2: Install the OBS Spout2 Plugin
🕒 (01:04 – 02:09)
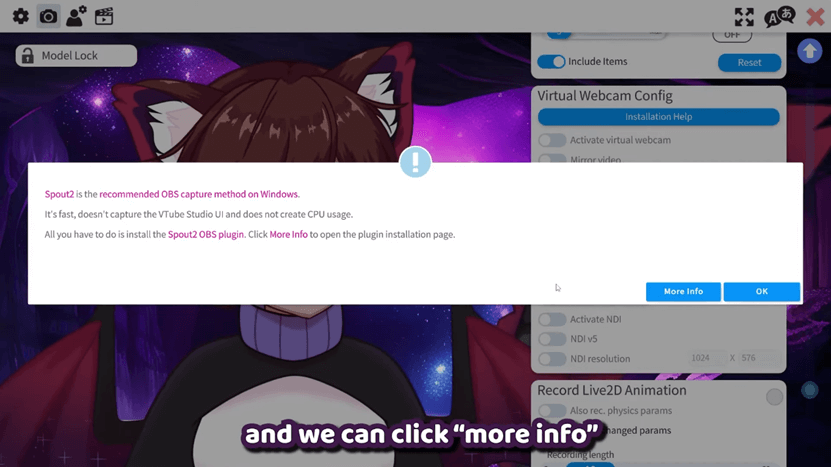
- In VTube Studio, click Install Spout2, or visit the official download page linked in the video description.
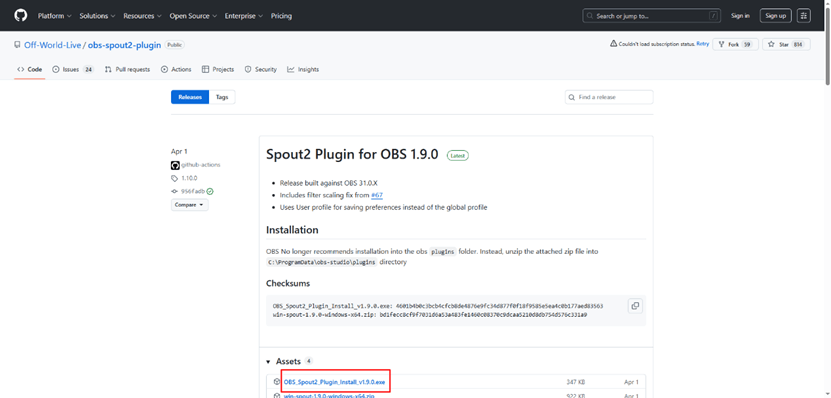
- Download the latest 1.9 version.
- Run the installer (.exe). If Windows warns you, click More Info → Run Anyway.
- Follow the on-screen steps.
- Important: Make sure the installation path matches where your OBS Studio is installed.
- Default: C:\ProgramData\obs-studio\plugins
Expert Insight:
Earlier tutorials may tell you to install the plugin inside the obs-studio\obs-plugins folder, but OBS no longer recommends that location.
Using the new C:\ProgramData\obs-studio\plugins path ensures full compatibility with the current OBS plugin system and prevents the “Spout2 Capture not found” issue.
Step 3: Add a Spout2 Capture Source in OBS
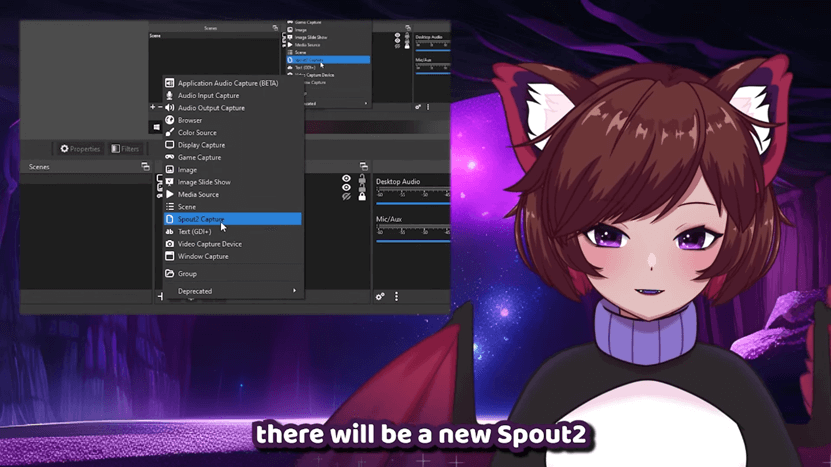
🕒 (02:29 – 03:18)
- In OBS, click the “+” button under Sources.
- Choose Spout2 Capture and name it (e.g., “VTube Studio Model”).
- In the Properties window, review these options:
- Spout Sender: Leave as Use First Available unless you have multiple Spout outputs.
- Composite Mode: Set to Transparent for a clear background.
Pro Tip:
If you want to show your VTube Studio background, keep Composite Mode as Opaque.
For transparent overlays, use Transparent mode instead.
Step 4: Troubleshooting & Optimization Tips
| Issue | Possible Cause | Fix |
| No Spout2 option in OBS | Installed in wrong path | Reinstall / unzip to C:\ProgramData\obs-studio\plugins and restart OBS. |
| Black screen | GPU assignment or permission conflict | Run OBS as Administrator, and ensure correct GPU selection in your graphics control panel. |
| Transparency not working | Composite Mode set to a non-alpha mode (e.g., Opaque) | In Spout2 Capture → Properties, change Composite Mode to Default / Premultiplied Alpha. |
| High CPU usage | Using Window/Screen Capture instead of Spout2 | Replace the capture method with Spout2 Capture for lower CPU load and better performance. |
Why Spout2 Works Better:
Spout2 uses GPU texture sharing (via DirectX or OpenGL) to transfer frames directly between applications, bypassing standard screen-capture methods. That means less CPU overhead and smoother performance compared to window captures.
Next Level Your VTuber Setup
Now that your model has a clean, transparent background, it’s time to give your stream a stage. Combine your VTube Studio avatar with a VIVERSE environment and make your virtual presence feel real.
👉 Read the guide: How to Use VIVERSE as a Source in OBS
Learn how to use VIVERSE Worlds as a source in OBS via the link above, or explore how to use immersive 3D backgrounds for your Just Chatting or live events.
Step 5: Enhance Your Stream with Extra OBS Plugins
Once your VTuber model is captured correctly, you can add visual polish using these plugins:
| Plugin | Function |
| StreamFX | Adds 3D transforms, blur, glow, advanced filters and transitions for a more dynamic look. |
| Move Transition | Enables smooth motion between scenes by animating changes in size, position and opacity of sources. |
| Audio Monitor | Allows you to monitor selected audio sources privately (on headphones) while keeping the stream’s main audio path clean. |
These plugins complement Spout2 perfectly and help you level up the quality of your VTuber streaming setup.
Conclusion: The Best Way to Connect VTube Studio and OBS
By using the Spout2 plugin, you can seamlessly connect VTube Studio and OBS, capture your model with a transparent background, and avoid green screen headaches.
This method gives you better performance, smoother workflow, and more flexibility for professional VTuber content creation.
We’d like to thank Cutie Dragon, a Live2D rigger and VTuber tutorial creator, for collaborating on this guide. Her clear tutorials and years of experience in Live2D setup and VTuber streaming have helped thousands of creators bring their avatars to life.
About the Video Author: Cutie Dragon

Cutie Dragon is a Live2D rigger and tutorial creator who has been working full-time in the field since 2021, with over four years of professional experience.
On her YouTube channel, she shares detailed guides and showcases that help VTubers understand both the technical and creative sides of Live2D rigging.
She also streams on Twitch from time to time, offering practical insights into setting up and refining VTuber streaming workflows.