The Non-Coder’s Guide to Creating More Advanced VIVERSE Worlds with MCP
The beauty of creating and publishing your content on VIVERSE is that it doesn’t require you to be a seasoned developer or coding expert to do it. All you need is an idea and the right tools that are currently available online.
Open-source 3D engines and suites like PlayCanvas and Blender let you build scenes and models from scratch. Though these tools come with a bit of a learning curve, there are now ways for you to use them proficiently without spending months mastering how they work.
Dedicated developers have already created a framework to incorporate the use of large language models (LLMs) like Claude to convert your chat instructions into detailed 3D scenes, unique 3D models, and even functional gameplay mechanics. This framework is called Model Context Protocol or MCP, which sounds highly technical, but once you’ve set everything up, you’ll realize that it’s actually quite simple to use.
In this guide, we’ll discuss the advantages of using MCP, walk you through the basic setup process, and give you some helpful tips along the way.
Watch how you can elevate regular PlayCanvas scenes into more advanced and interactive VIVERSE Worlds through MCP
What’s good about using MCP?
We can summarize the benefits of working with MCP to these three items:
- You can create immediately while learning in the process.
Using MCP with tools, such as PlayCanvas and Blender, lets you start working on projects even though you’ve never used these tools before. Since you’re working with AI, you can easily give instructions via chat, and it will do most of the technical heavy lifting.
This not only cuts down the lengthy preparation time you would normally spend studying several manuals and tutorials beforehand, but it also lets you get familiar with the tools by observing how AI uses them and even asking AI to explain its process to you.
- You can delegate menial tasks so you can focus on the important ones.
Another advantage of using MCP is how it allows you to use AI to do menial repetitive tasks on your behalf.
One such task is when you need to fill your scene with 3D models. If you want to turn a blank plane entity into a sprawling cityscape, for example, you can easily instruct AI to cover the plane’s surface using building models in your ASSETS library.
- You get to code without knowing how to code.
What makes VIVERSE appealing to a lot of users are the engaging and immersive experiences they get every time they visit different creator Worlds. If you’re one of those aspiring creators who’s thinking of adding animation or interactive elements into your World but never had the coding skills to execute your plans, then you can take advantage of MCP and ask AI to write the scripts for you.
There may be a lot of trial and error when you’re starting out, but as long as you have a solid idea and use that to guide your chats with AI, you can easily troubleshoot any issues and come up with working scripts that can power your games and 3D Worlds.
How do I set up the MCP server?
For first-time MCP users, we recommend trying it out with user-friendly open-source tools like PlayCanvas and Blender.
IMPORTANT: The requirements, steps, and supported platforms listed below may change at any time so make sure to check the official PlayCanvas Editor MCP and Blender MCP documentation for the latest updates.
Prerequisites
Before anything, you will need the following requirements for each platform:
| PlayCanvas Editor MCP | Blender MCP |
| PlayCanvas account Google Chrome: This browser supports the PlayCanvas extension. Claude for Desktop: Claude is currently the best LLM that works with PlayCanvas Editor MCP. Its desktop version allows you to set up the MCP server. PlayCanvas recommends using a paid subscription for more flexibility. Node.js and npm: These help you connect Claude to PlayCanvas. All other dependencies on GitHub | Blender 3.0 or later versions Claude for Desktop: Claude is currently the best LLM that works with Blender MCP. Its desktop version allows you to set up the MCP server. Python 3.10 or later versions and uv: These help you connect Claude to Blender. All other dependencies on GitHub |
Setting up the PlayCanvas MCP Server
Perform the following steps to set up the PlayCanvas Editor MCP server.
Download the dependencies
- Go to https://github.com/playcanvas/editor-mcp-server.
- Click Code > Download ZIP.

- Extract the server files.
IMPORTANT: You will use the folder containing the server files when setting up the MCP server. Make sure to remember the folder path.

Install the dependencies
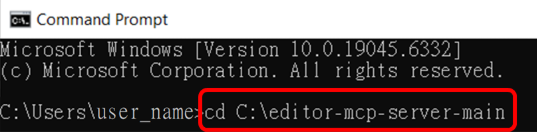
- Launch Command Prompt (Windows) or Terminal (macOS).
- Enter cd [folder path].
This folder path is where you saved the dependencies in.
- Enter npm install.
Install the Google Chrome extension
- In Google Chrome, go to Extensions > Manage Extensions.
- Make sure Developer mode is turned on.
- Click Load Unpacked.
- Select the extension file, and then click Select Folder.
- Make sure that the extension is turned on.

Update the config file
- In Claude for Desktop, go to File > Settings > Developer.
- Click Edit Config.
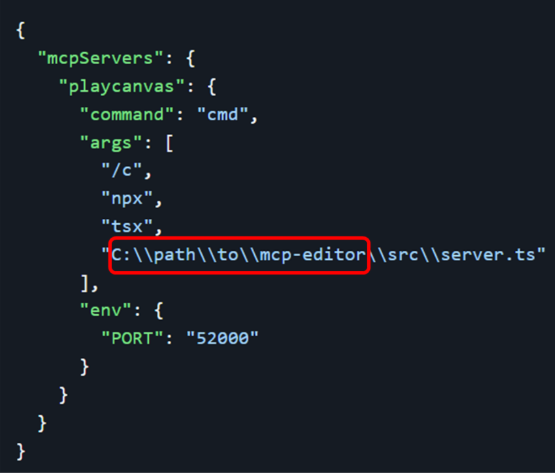
- Open claude_desktop_config.json in a text editor.
- Go to the GitHub page and copy the config for your platform.
- Paste the code into the config file.
IMPORTANT:
- Update the folder path using the same folder path where the dependencies are saved in.
- If you have more than one server, separate the entries with commas.
- Save the config file and then restart Claude for Desktop.
TIP: If the server is not activated, you may have to restart your device.
Turn on the connection
- Open Claude for Desktop and your PlayCanvas project.
- On Claude for Desktop, click the Search and tools button
 .
. - Turn on PlayCanvas.
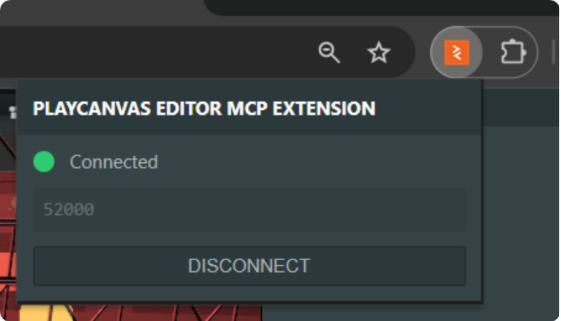
- On Google Chrome, click the Extensions button
 .
. - Click PlayCanvas Editor MCP > CONNECT.
Setting up the Blender MCP server
Perform the following steps to set up the Blender MCP server.
Download the dependencies
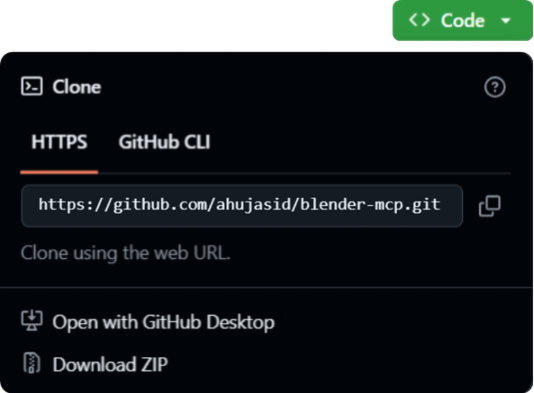
- Go to https://github.com/ahujasid/blender-mcp.
- Click Code > Download ZIP.
- Extract the server files.
Update the config file
- In Claude for Desktop, go to File > Settings > Developer.
- Click Edit Config.
- Open claude_desktop_config in a text editor.
- Go to the GitHub page and copy the config for your platform.
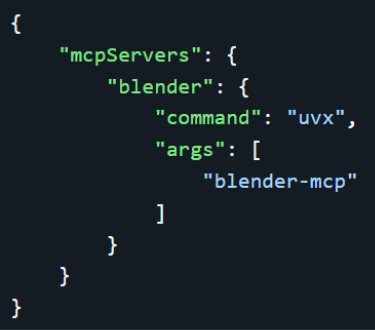
- Paste the code into the config file.
IMPORTANT: If you have more than one server, separate the entries with commas.
- Save the config file and then restart Claude for Desktop.
TIP: If the server is not activated, you may have to restart your device.
Install the Blender MCP add-on
- In Blender, click Edit > Preferences > Add-ons.
- On the upper-right corner of the window, click the Add-ons Settings button
 , then Install from Disk…
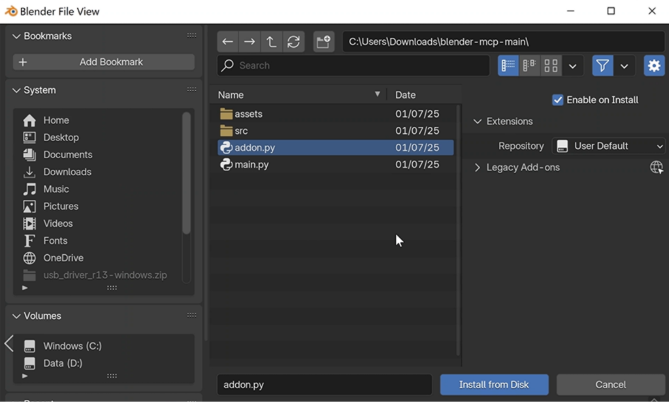
 - Locate and select addon.py and then click Install from Disk.
- On the Add-ons tab, make sure that Blender MCP is turned on.
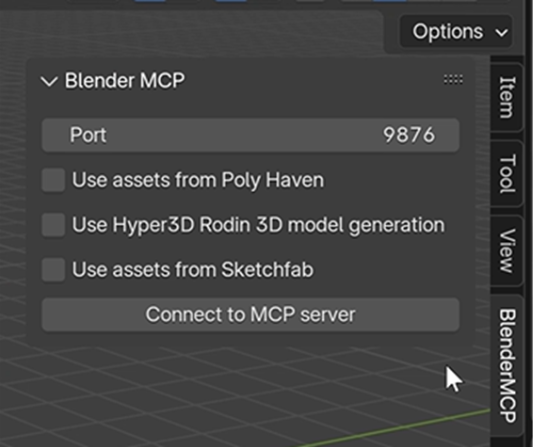
Turn on the connection
- Open Claude for Desktop and your Blender project.
- Press N to open the sidebar.
- Click BlenderMCP.
- Click Connect to MCP server.
Tips on using MCP
With everything set up, the exciting part now begins. It’s really up to you how to utilize AI in your World creation process, but before you dive in, we have a few tips that may help make your MCP experience a little better.
Be strategic
If you’re not going for anything specific and just want to explore what you can do, you can let AI take the reins and see where it goes. But if you are trying to save AI credits and extend your use of MCP, you need to be more strategic when chatting with AI. To do this, keep your prompts short and specific. You can also set limits for AI so it doesn’t do more than what you ask for.
Take screenshots
AI models are pretty smart and use computer logic and testing to assess whether or not they’ve succeeded in doing what you’ve asked them to do, but you still have a big advantage over them: You can actually see their output.
You may experience some cases where the AI says one thing, but it doesn’t match the actual result. Take screenshots of your project and send it together with your follow-up prompt. This will help AI visualize the actual results and adjust their strategy accordingly.
Save backups regularly
AI tends to make mistakes, and some of them are irreversible. To prevent destroying any progress you’ve made, make sure to download the latest working version of your project. Every time you are satisfied with a working script, scene, or model, save your project files and keep track of their version number.
Having a repository of your drafts will allow you to restore your project to a previous working state.
Dare to do more with MCP
If you feel like your lack of coding or 3D modelling skills are holding you back from creating your ideal VIVERSE World, then you can take advantage of AI and MCP to finally set things in motion.
Note: Later updates of the PlayCanvas Editor MCP may upgrade, modify, or remove certain functionalities mentioned in this blog post. Make sure to check the latest documentation on GitHub for details.